
Go7 Gaming chests are more challenging to build than our inserts and bit boxes. However, by taking it step-by-step, construction is rather simple. This walkthrough uses the Agricola chest as its basis, but it is easily applied to the EXT-001 or EXT-003 chests.
Baltic Birch
Our chests are cut using Baltic Birch. The chest itself is cut using 6mm Baltic Birch. Inner inserts, trays, and in the case of the Agricola chest, bit boxes are cut using 3mm Baltic Birch.
Glue
Everyone has a favorite glue. Mine is Sobo Craft Glue. When building inserts, you want a thick, tacky white glue that sets quickly and dries clear, allowing you to continue building and not hold pieces for too long, while waiting for them to bond together. You don’t have to use Sobo, but you should use a tacky glue if possible. It will make the experience almost effortless.
A couple of things to consider when using a tacky, fast-setting glue are:
1) the glue sets fast. Keep this in mind as you are glueing.
2) You want to be neat. When you first push two pieces together, excess glue will be pushed out. You want to carefully wipe this glue away with your finger or a proper glue tool. I prefer fingers. DO NOT USE A DAMP PAPER TOWEL! When cleaning up glue in areas where the laser has left a brown edge, a damp paper towel will rub the brown residue onto your other surfaces making a mess.
Sanding
I strongly recommend sanding and I always sand the individual pieces prior to gluing. A 220 – 240 grit sandpaper works great. If you want to get super serious, you can follow the 220 grit with a 320 grit sandpaper. You may want to sand your browned edges. It’s your choice. If you sand the browned edges, you will end up with a dark-light-dark-light-dark banded surface. It looks neat!
The cut pieces will have brown areas due to the cutting process. These markings sand off.
Clamping
When working with 6mm plywood, clamping can sometimes be helpful if you have a piece of wood that is slightly warped. These pieces are rare, but ambient moisture can sometimes introduce some warping. Out of the hundreds of units I have constructed, I rarely need clamps and in most of those cases, you can just hold the piece tightly together for 30 seconds – 2 minutes to achieve the desired effect. Heavy books can often provide the desired effect too.
Painting/Finishing
After sanding, applying a stain (gel or liquid) to your chest surfaces will result in a chest that will make your friends jealous! Once you apply a couple of coats of stain, you can apply a polyurethane finish. I strongly recommend brush-on polyurethane and I usually use semi-gloss. In terms of brands, pretty much any stain / poly brand will work great. Your local home improvement store will likely offer MinWax and that’s a fine brand.
Read the directions on the cans as they will indicate the types of tools you will need (brushes or rags for stains, steel wool for polyurethane).
Work Area
A good work area will make your construction project quick and orderly. You don’t need much space – maybe a 36″x 24″ area. I like to lay some printer paper down on my work surface and I place an extra piece of paper to the side to act as a glue collection area to wipe my fingers on.
Handle Small Pieces with Care
The long thin rails are tough, but treat them with care. They can be broken if enough force is applied!
The Top Lock
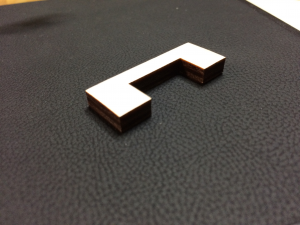
This is the “lock” that is used to secure your lid when the chest is closed. Do not apply glue to this piece!
Dry Fitting
Before you start glueing things, you should layout the pieces and dry fit them so you have a good understanding of how they go together. This is Golden Rule #1. This will help you avoid mistakes such as glueing the wrong side of a piece. Once you dry fit your insert, you can lay the pieces out in their approximate positions as a reminder of what goes where. It helps!
Chest Components
When building a chest, there are several distinct pieces:
1) the chest itself
2) the top tray
3) the lid
4) bit boxes (Agricola / Devastation of Indines)
5) bit trays (Agricola)
6) inserts (the EXT-003 has an ASB-004 insert)
Consider each of these a distinct project and build one at a time.
This walkthrough will focus on the top tray, the lid, the bit trays, and the chest itself. For bit box construction, check out our bit box construction walkthrough. For insert construction, check out our insert construction walkthrough.
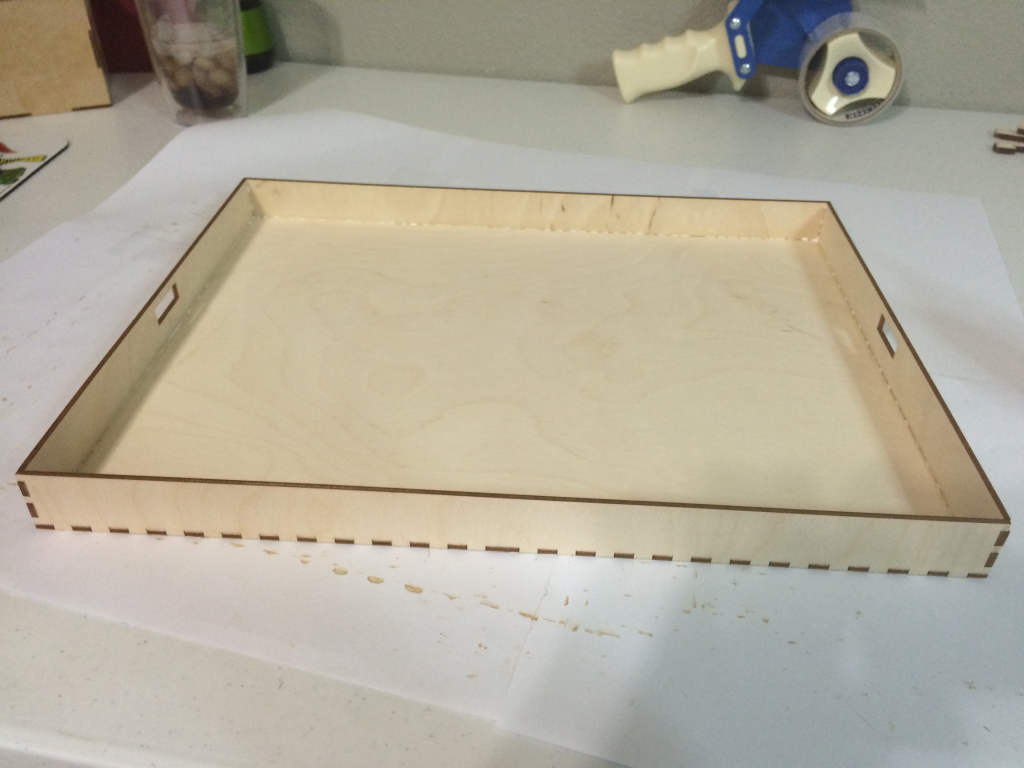
Top Tray Construction
Every large chest we produce includes a top tray for instructions, maps, etc. Let’s walk through the construction of the top tray first.
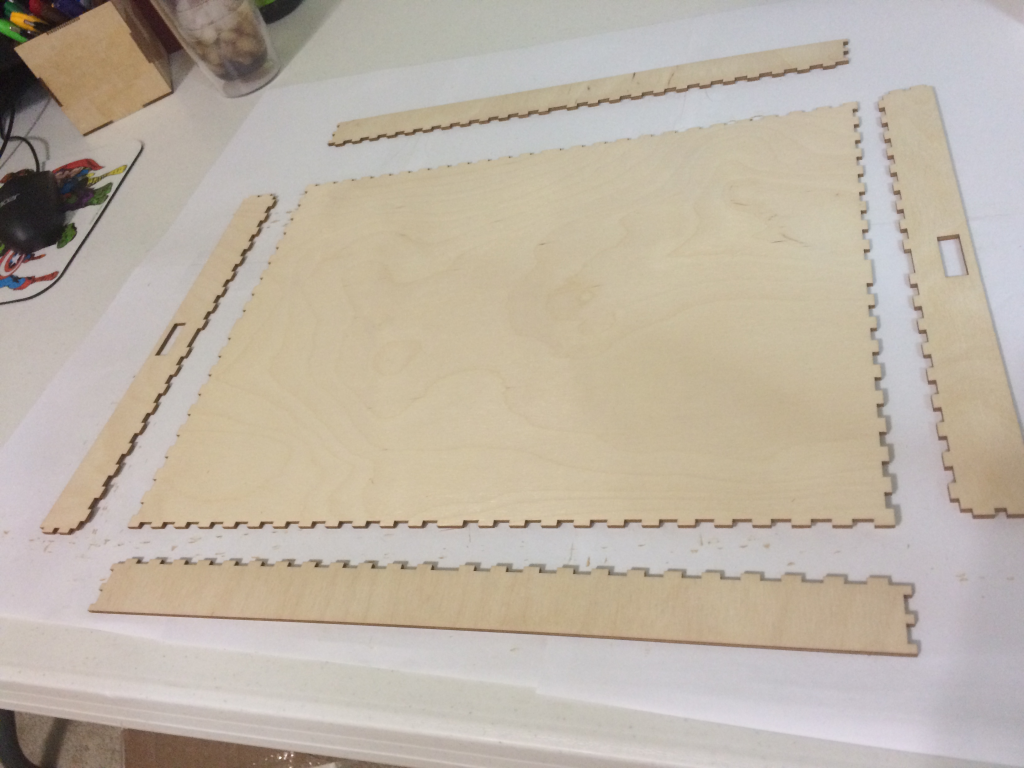
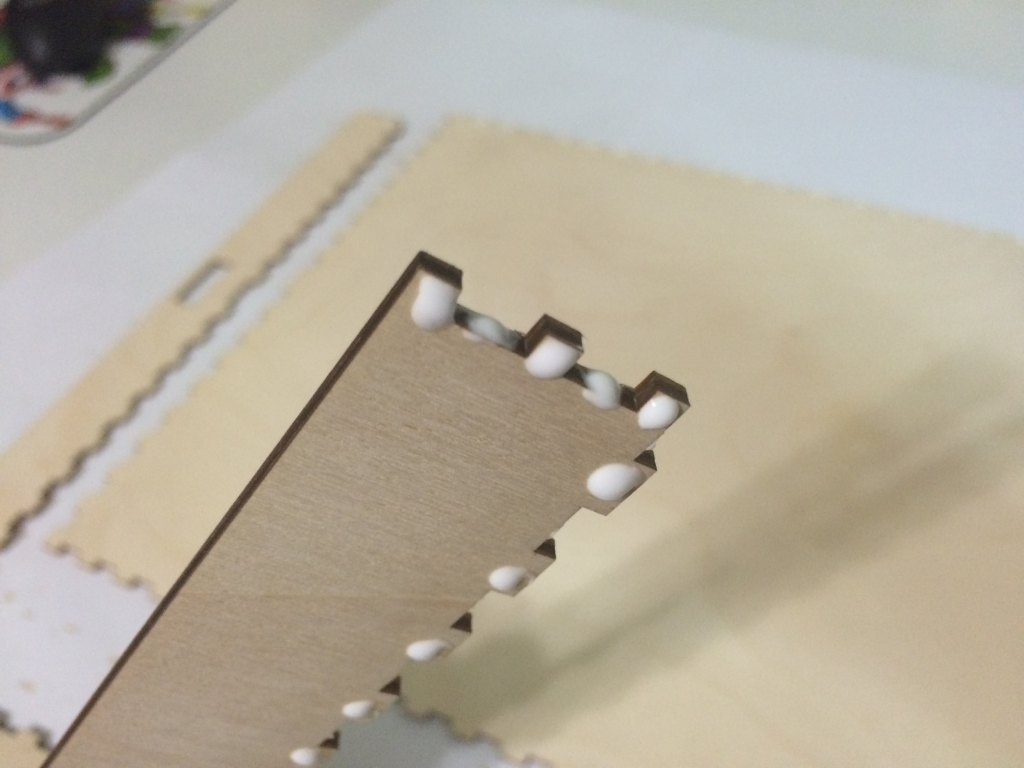
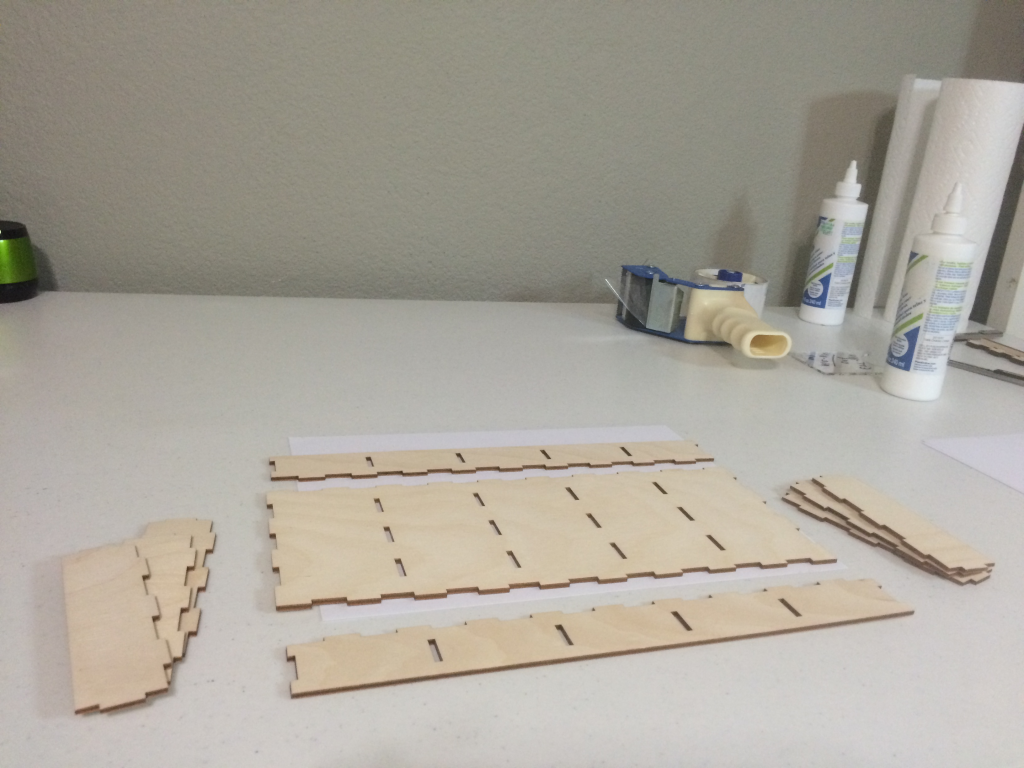
First, lay out the pieces of the top tray and inspect the pieces. You always want to face the best site outward. Then, do a quick dry fit. This will give you an idea if you have any pieces that may not be perfectly flat. Note this as you will want to spend a little extra time pressing these pieces together.
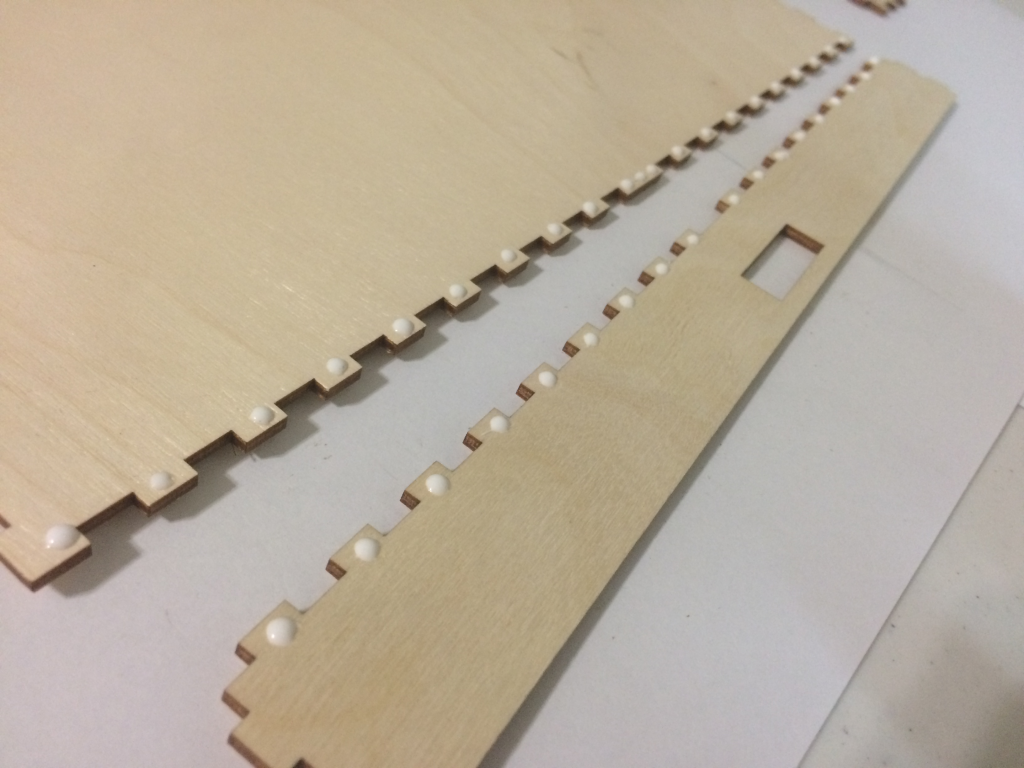
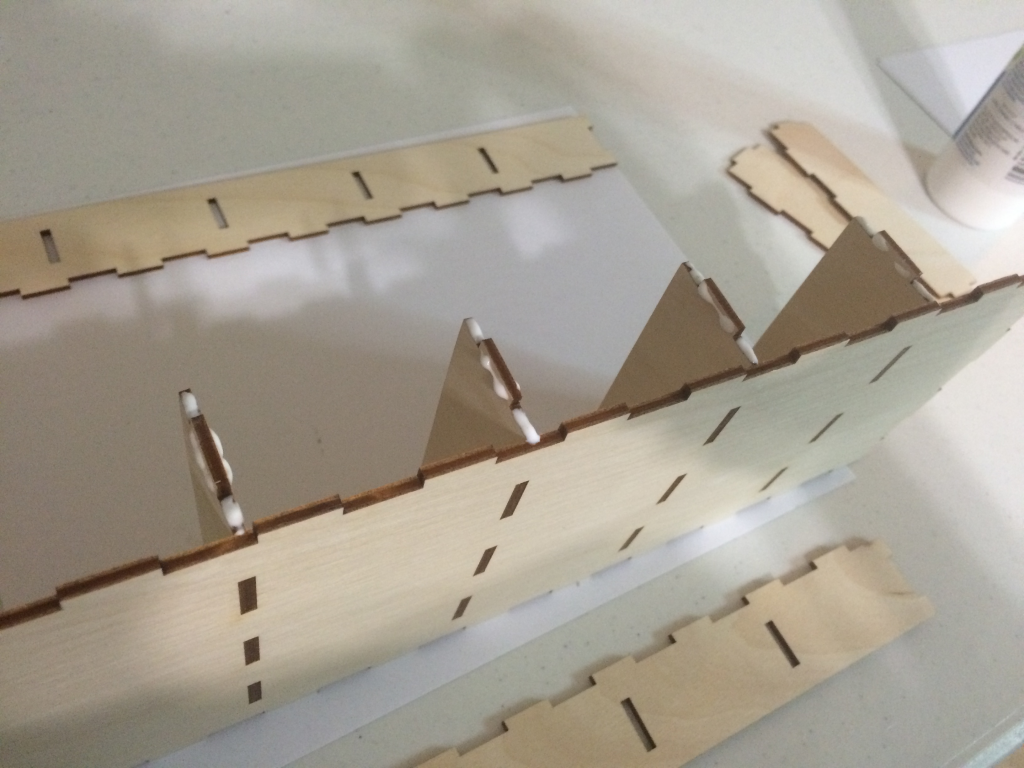
There are two approaches to glueing you can take here. Above I have illustrated placing a small dot of glue on each pillar. You can also push the base and side together like a puzzle and draw a long, thin line of glue across the pillars. This method is a little quicker, but will result in more glue cleanup.
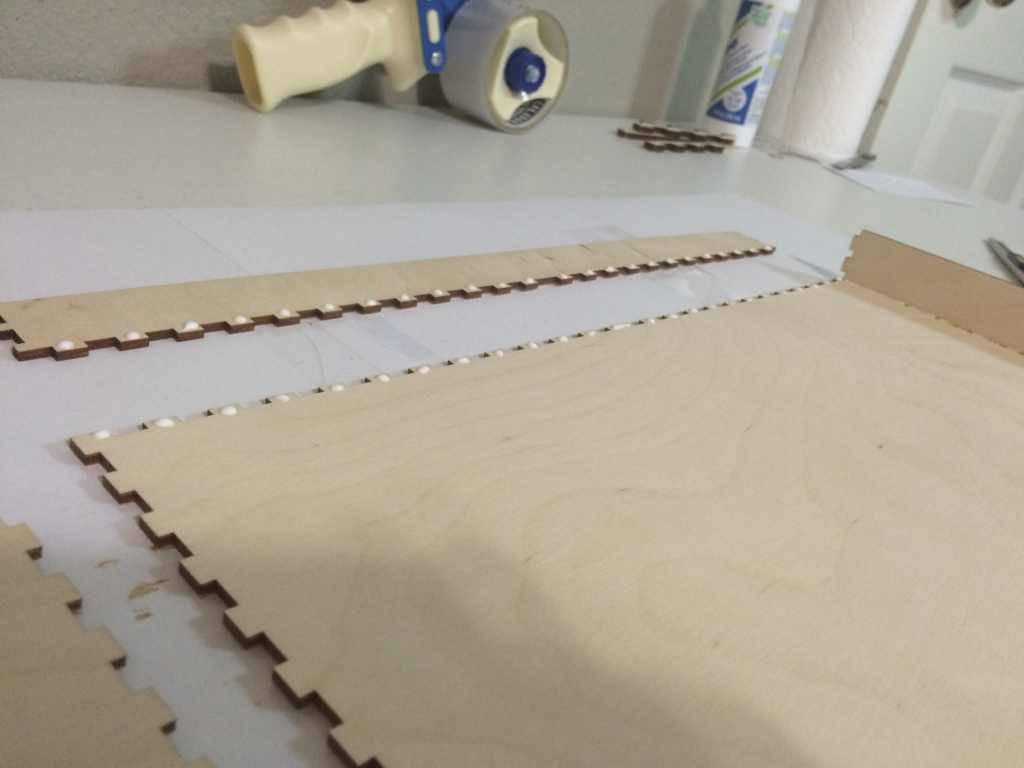
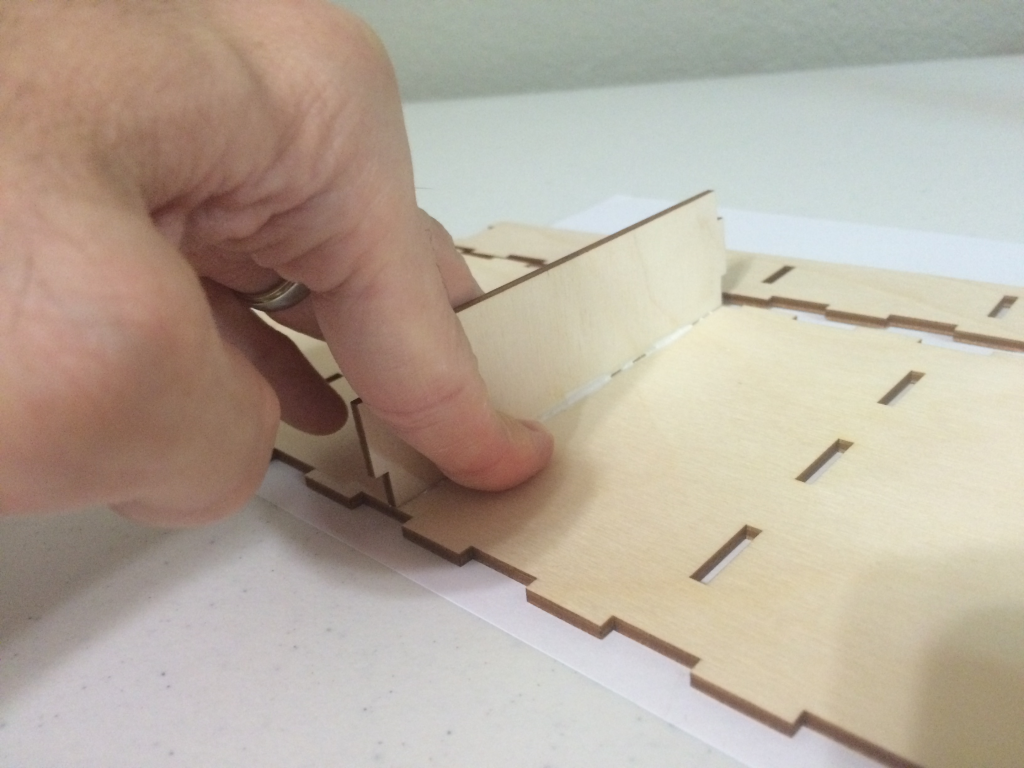
I recommend you place glue on a long and short side as well as along two sides of the base. Then place the two sides together on the base. The two sides will then provide support for each other and make the process much easier.
Also, make sure you place some glue on the ends of each side piece.
As you add each piece, you will want to run your finger along the inner glued seam and flatten the glue and then wipe your finger off. Also, clean the glue off of the outside of each piece at the bottom edge.
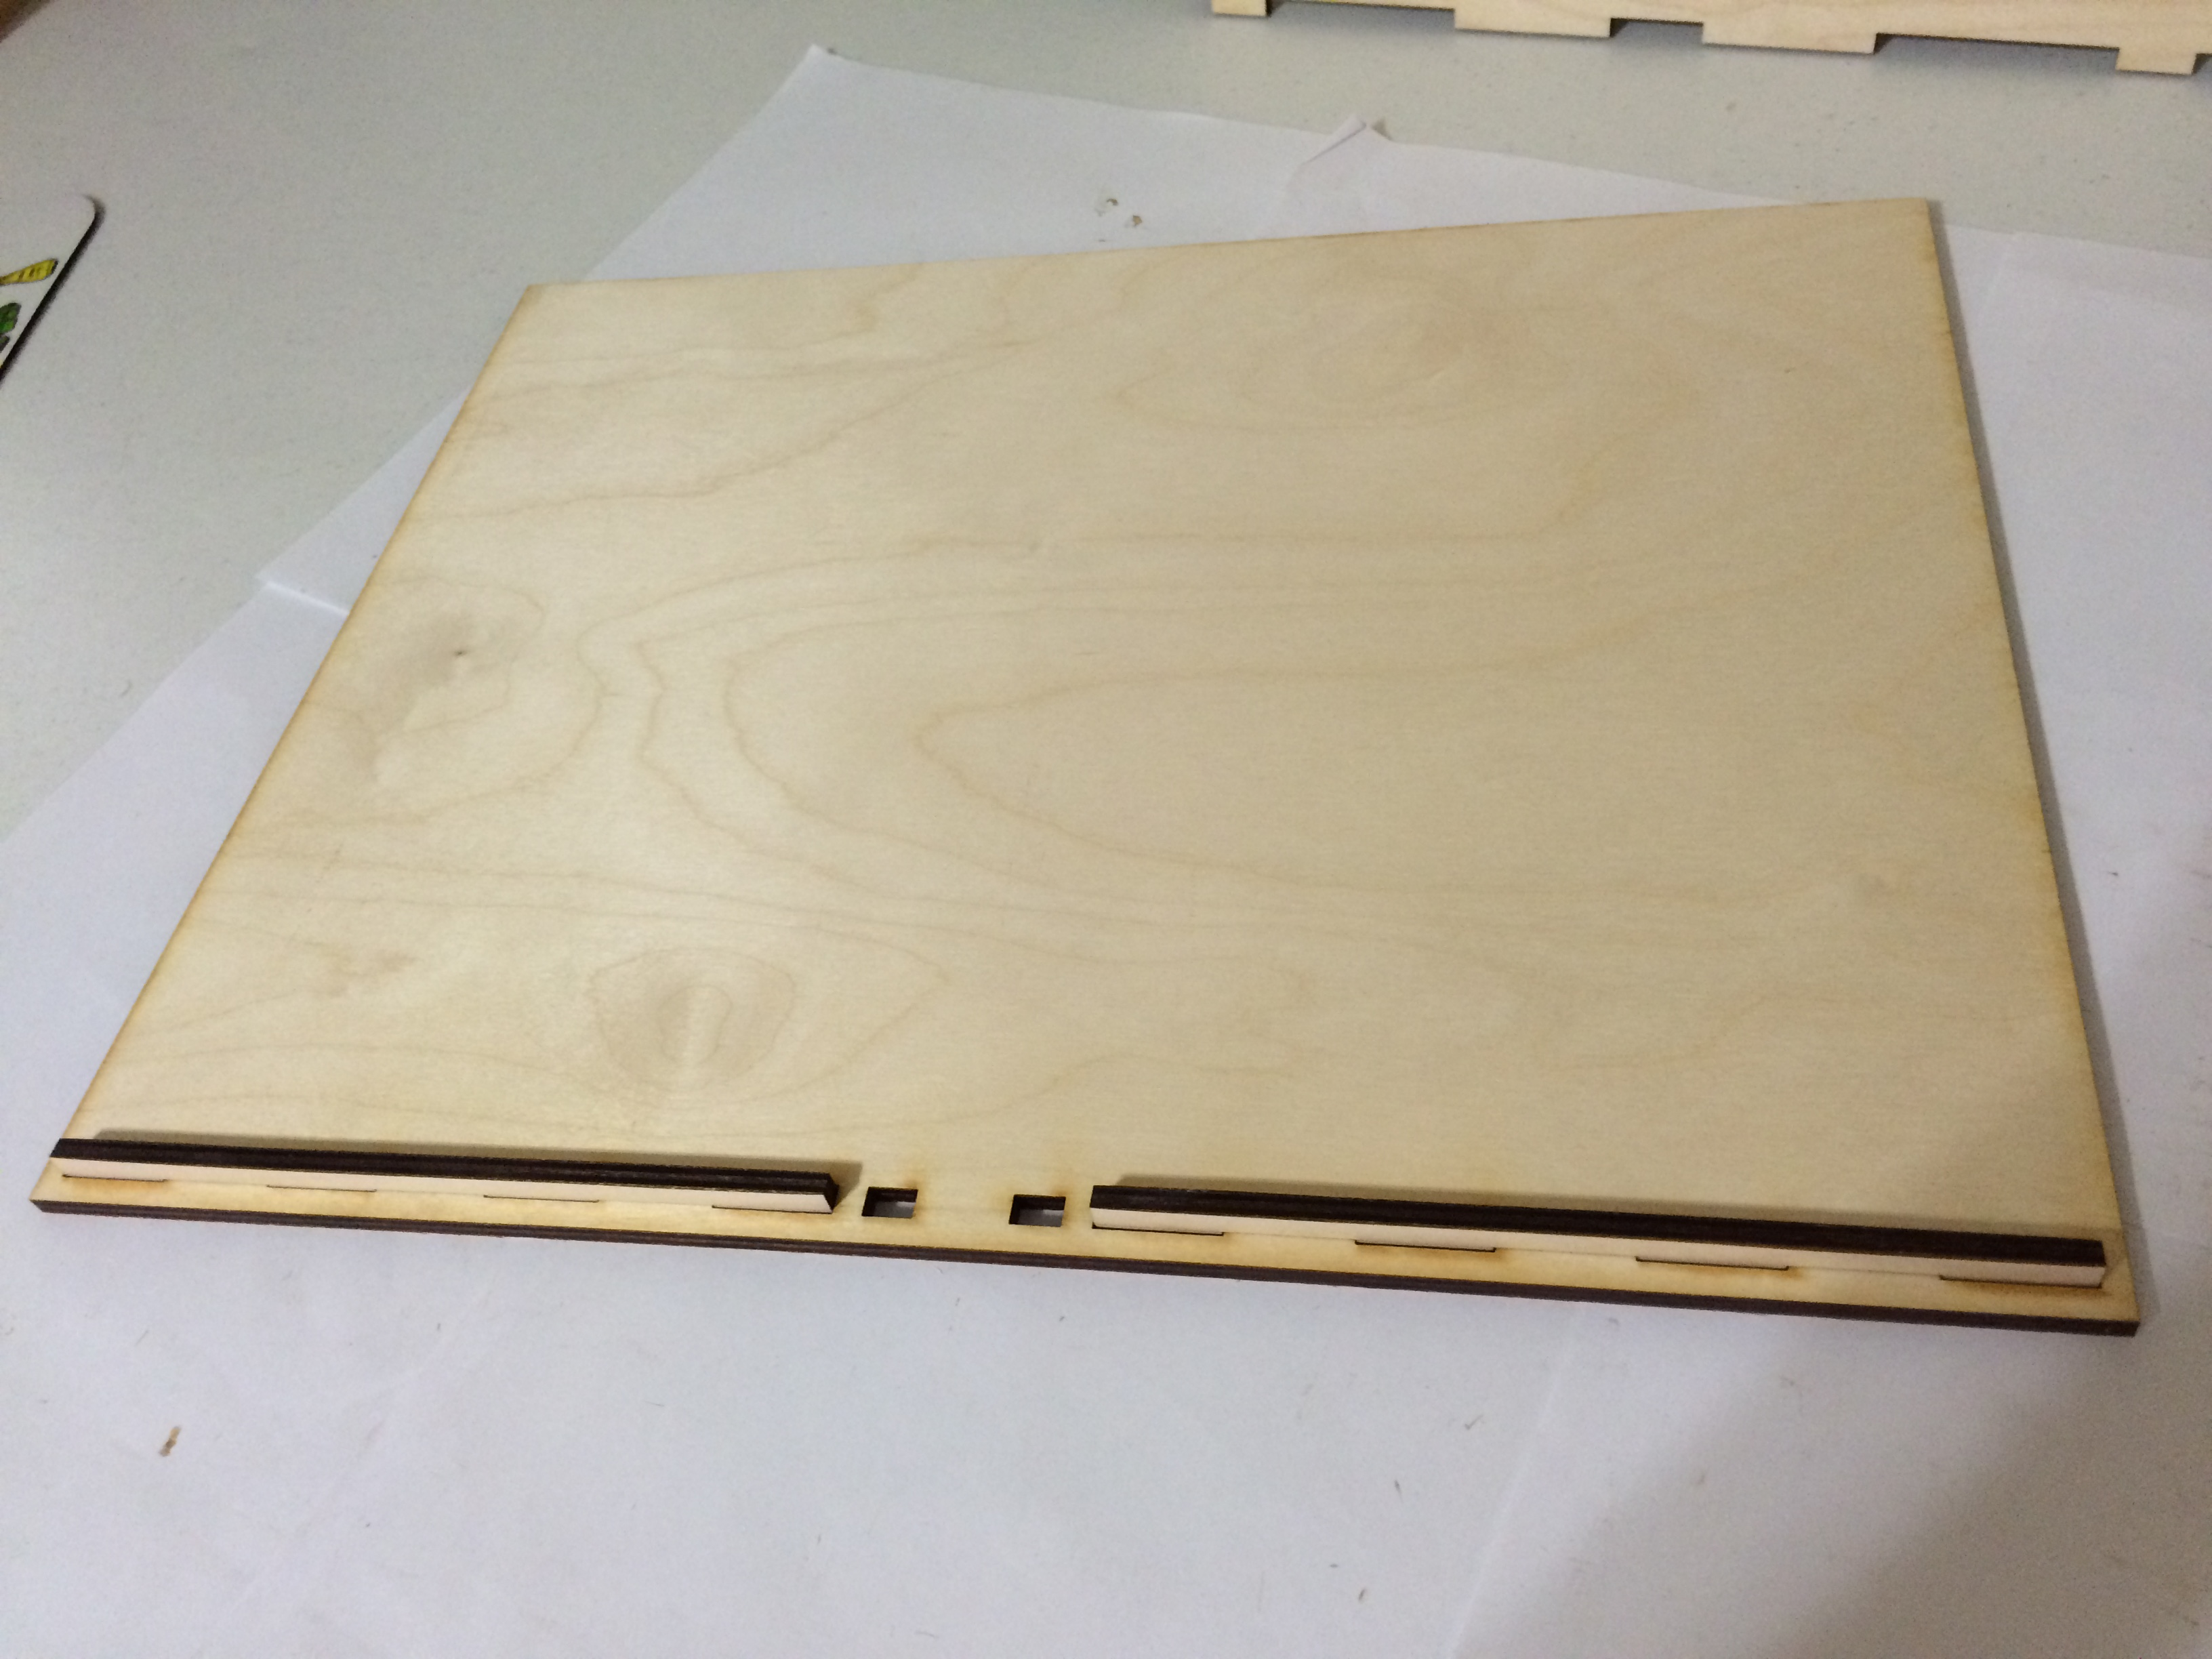
Lid Construction
Lid construction is very simple and involves attaching the two handles to the lid. As always, carefully consider which side of the lid you want to have facing outward (if not engraved).
Apply glue to the handles, one at a time, and then insert the handle and cleanup the glue. Note, I have placed glue on the other side of the longer portion of the handles.
Once complete, allow the glue to dry for several hours before using the lid.
Bit Tray Construction
Bit trays are very similar to our bit boxes, minus a top.
As always, build from the center out. You should only glue the lower surface now. After you place each piece, cleanup the excess glue.
Once all of the inner walls are glued to the base, prepare the ends of one side and attach the long side. Next, cleanup the excess glue.

Once the long sides are attached, glue and place the two end pieces.
Chest Construction
This walkthrough uses the Agricola chest, but the same techniques apply to our other chests. When differences matter, they will be noted.
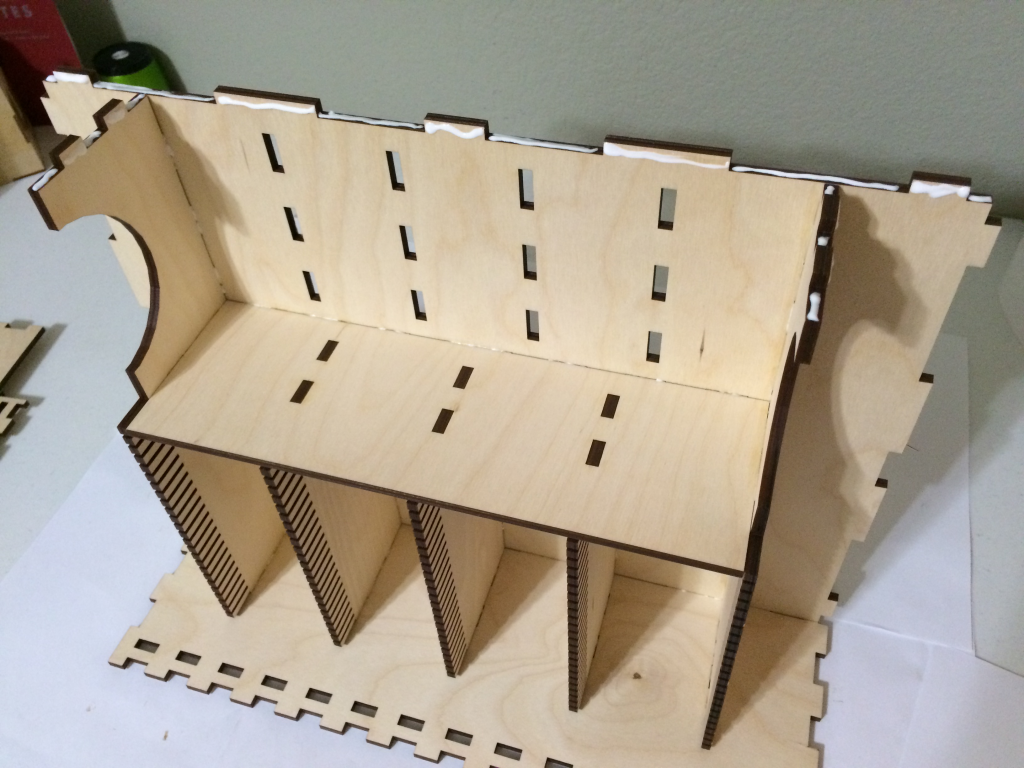
Build from the Inside Out
This is Golden Rule #2 and it applies to all of our products. You should always place inner walls and pieces first and build out towards the outer walls of the chest. The Agricola chest is special, though. It has a rather complex inner structure that requires you to glue the rails together and then glue them to the bottom of the chest. With any other chest, you can sit the bottom on your work surface and glue the inner rails to the bottom.
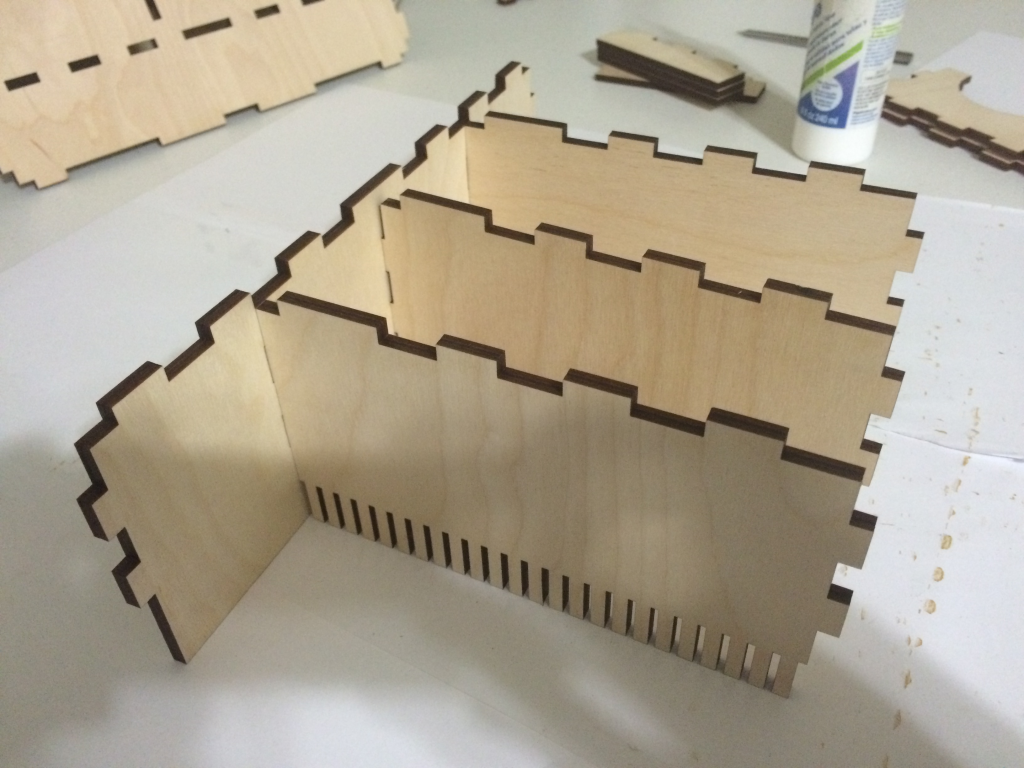
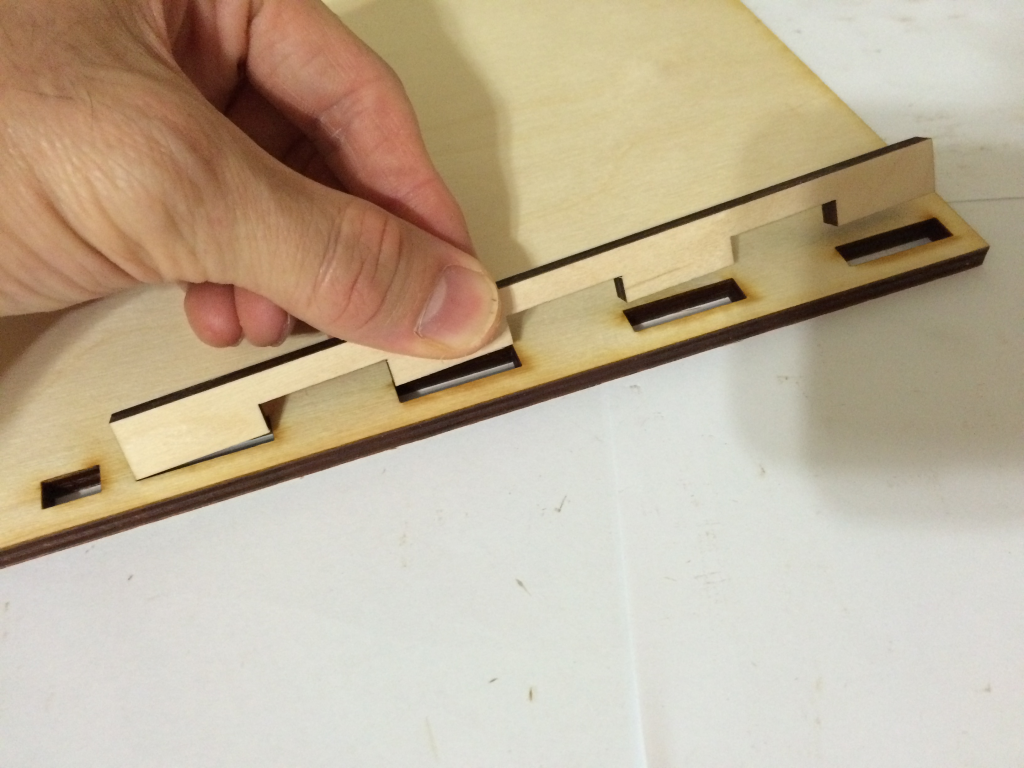
Here you can see how the tenon (areas that stick out) and mortise (holes the tenons slide into) come together by dry fitting the pieces. You should first glue the three shorter rails (other chests simply have five equal rails) to the inner wall. Note that you want to build upside down.
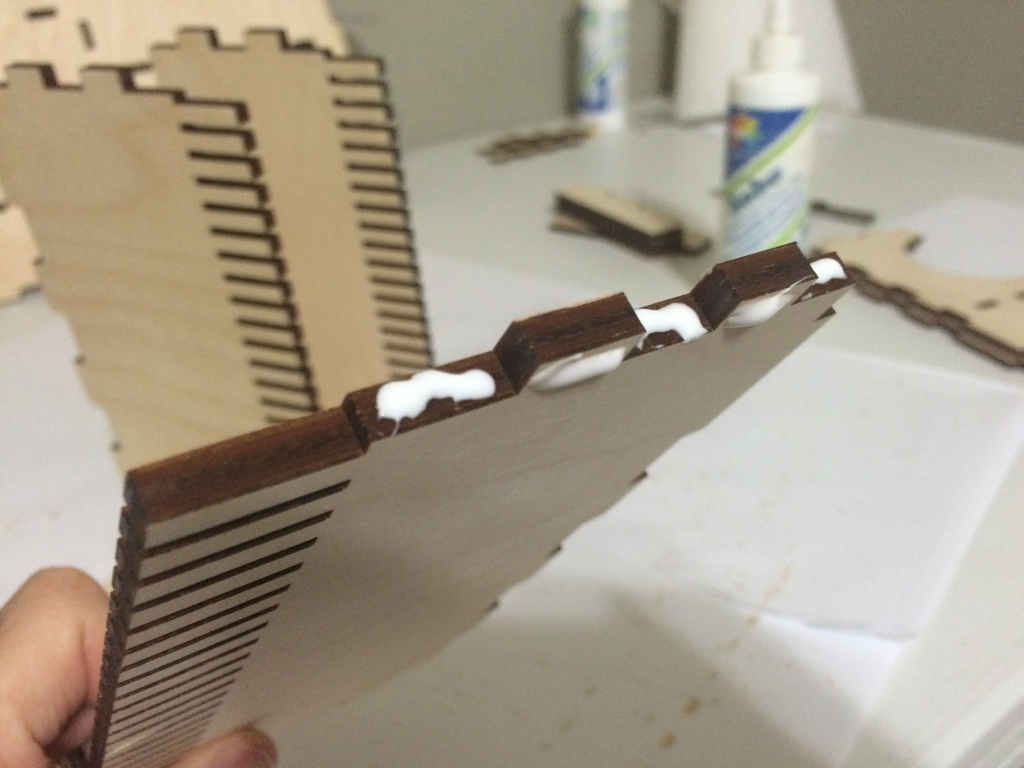
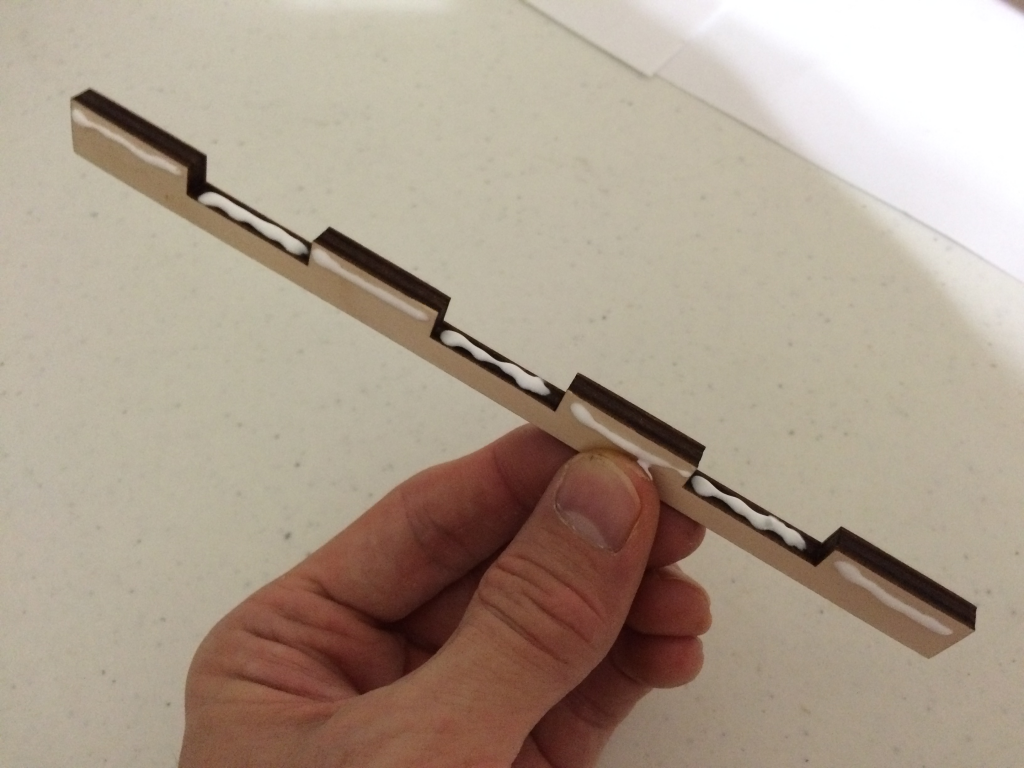
Don’t forget to glue both sides of the tenons (only one side shown here). Once you have the three rails joined to the inner wall with glue, go ahead and glue the two longer rails to the inner wall.
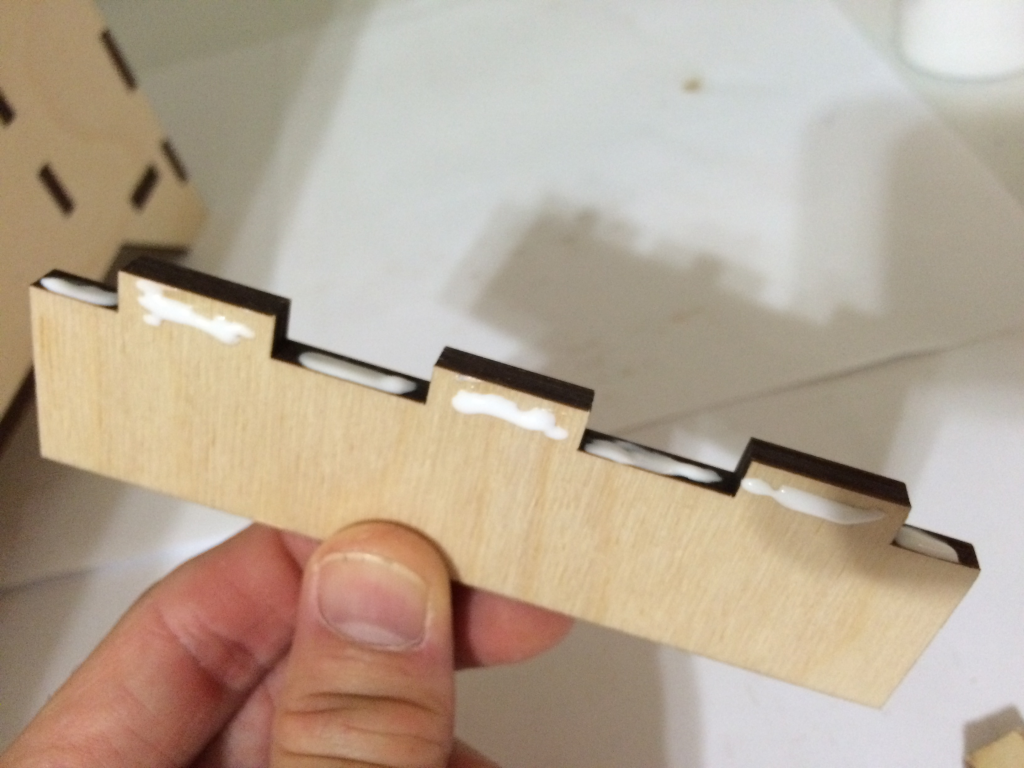
Once you get the longer rails glued to the inner wall, you need to apply glue to all of the tenons and the valleys between them on the bottom of the rail structure.
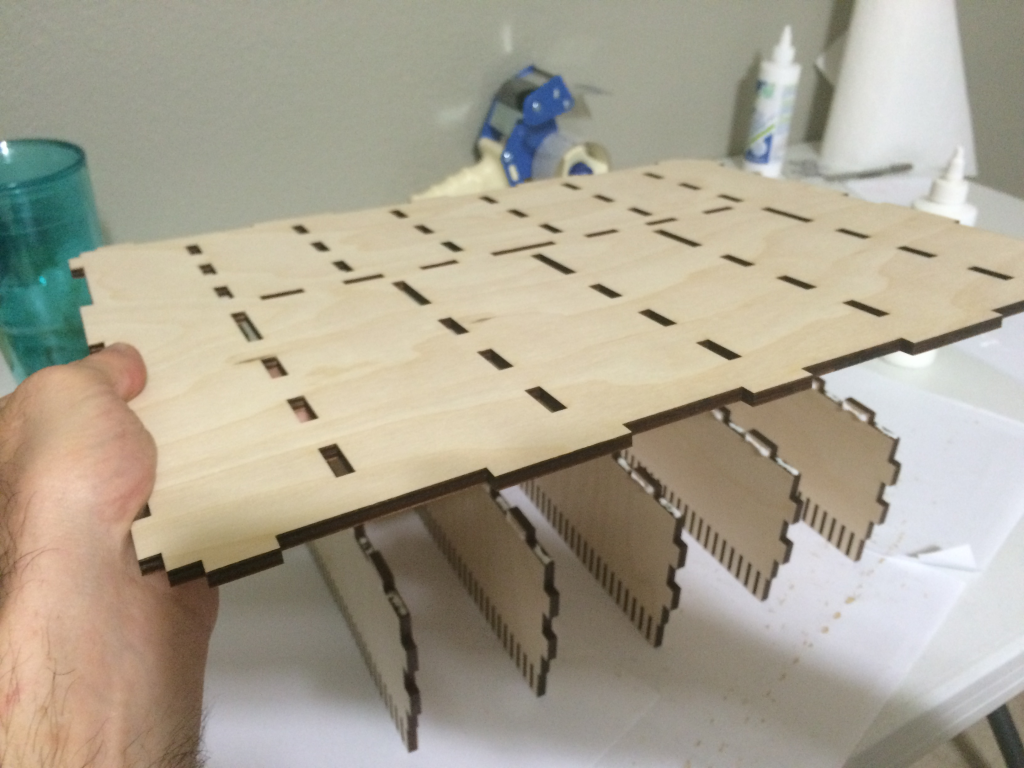
Now, place the bottom of the chest on top of the rail structure and working from one side to the other, align the tenons and seat the bottom. Then flip it over! This entire process is only required for the Agricola chest.
For the EXT-001, EXT-003, and Devastation Chests, place the bottom of the chest on the tables and glue each rail in, one at a time. You don’t need to build the inner structure upside down.
Next, you should clean up the excess glue.
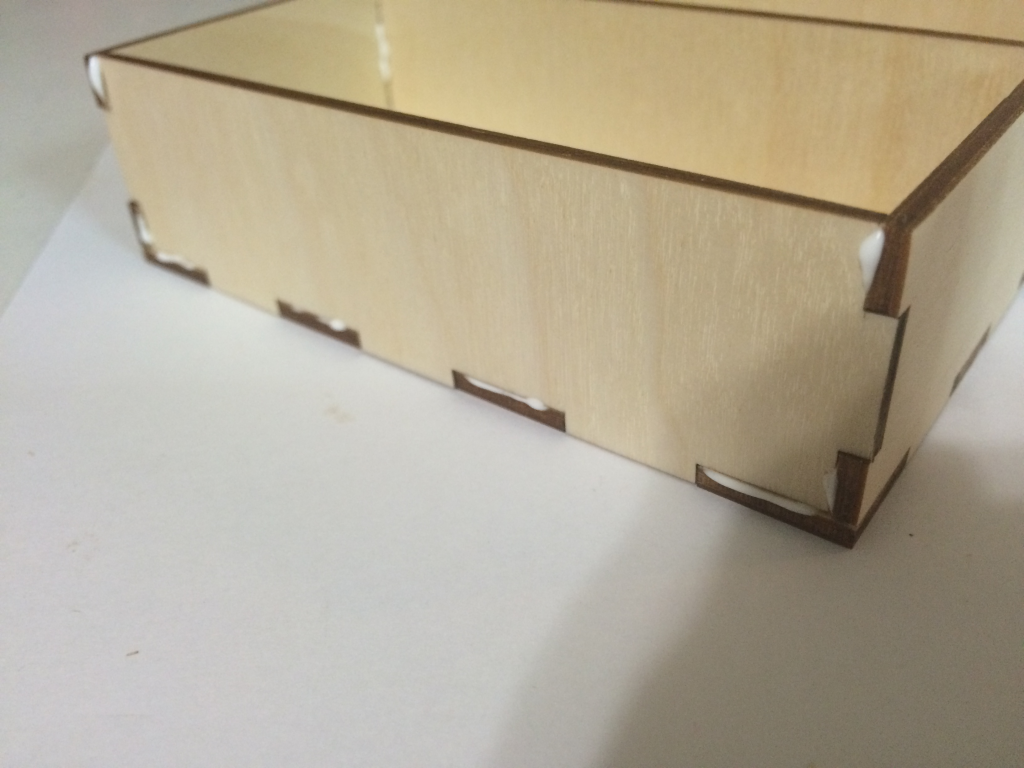
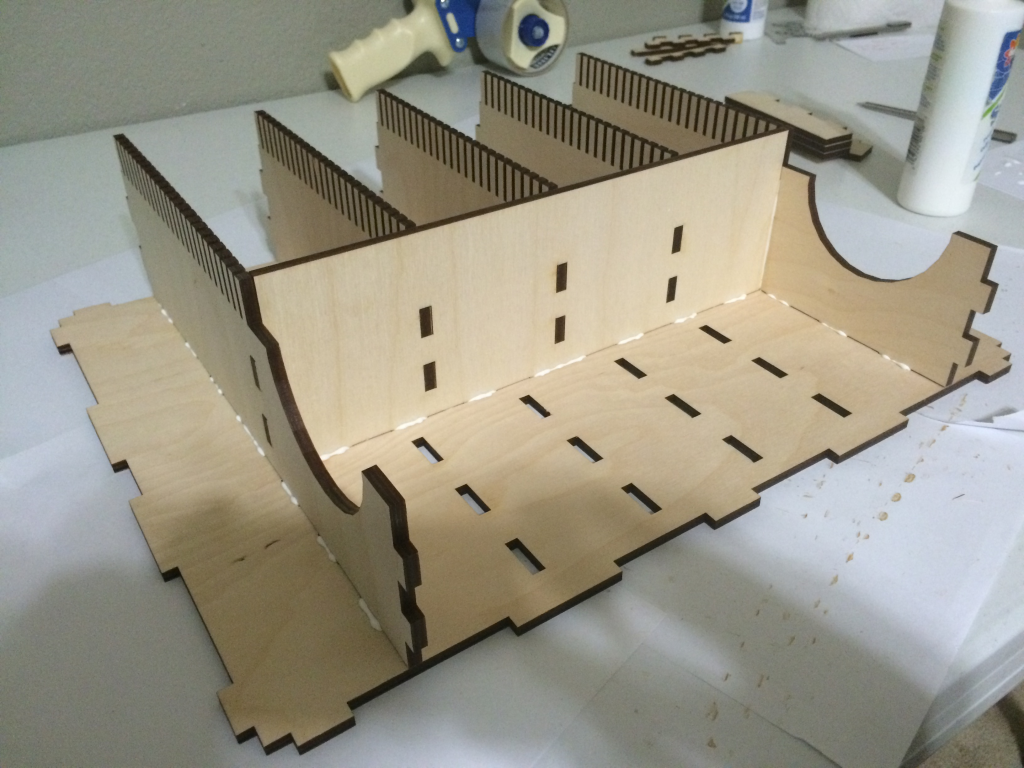
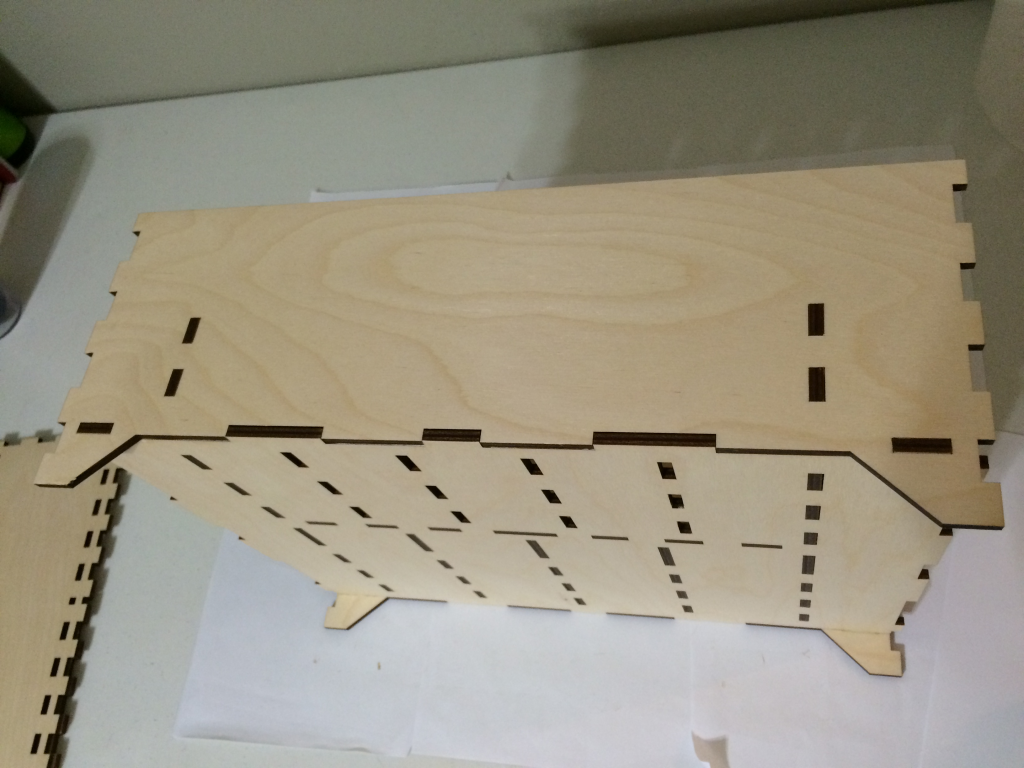
The rear portion of the chest should be glued next. The rear is the longest piece with a place for the rails at the top. The front does not have rail cutouts. As before, you should glue the tenons and the flat surfaces that will come into contact with the rear piece, and once placed, clean up excess glue.
The front area should then be prepared with glue and the front piece glued. The front piece is not as tall as the rear, since this is the area where the lid slides into the chest.
If you encounter a piece that doesn’t quite lay flat or any small gaps, you can use a clamp or you can simply hold the piece under pressure for 30 seconds to a minute or two, until the glue sets enough to hold the piece in place. Heavy books can also sometimes help out.
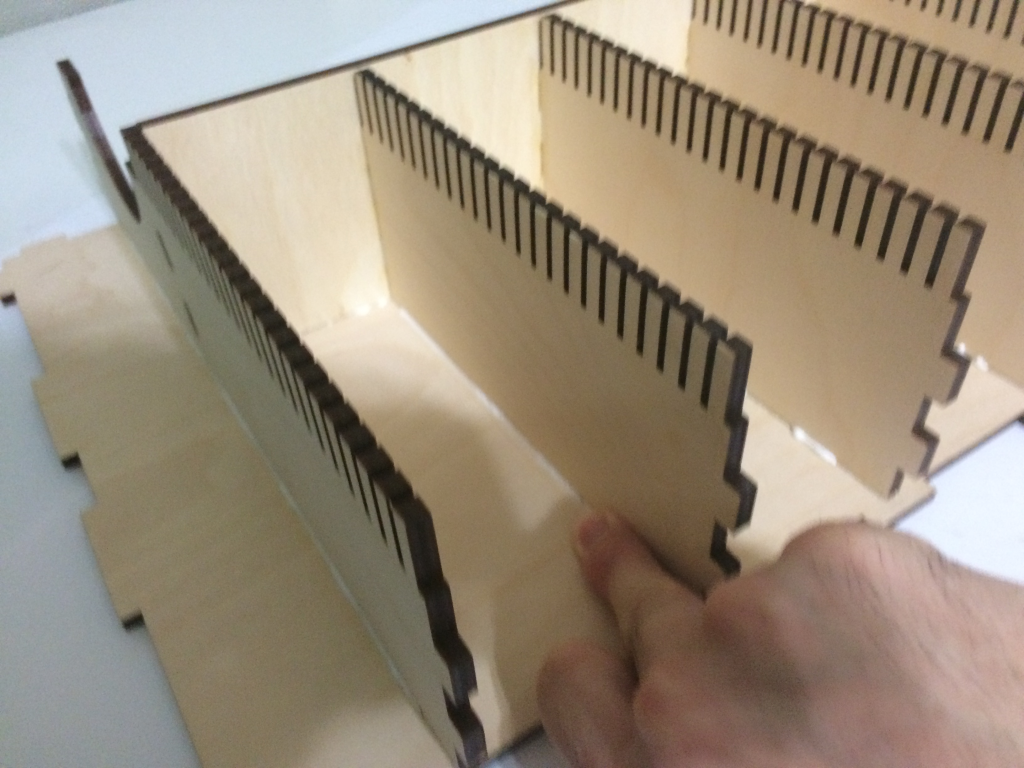
The sides attach in the same way that the front and rear attach.
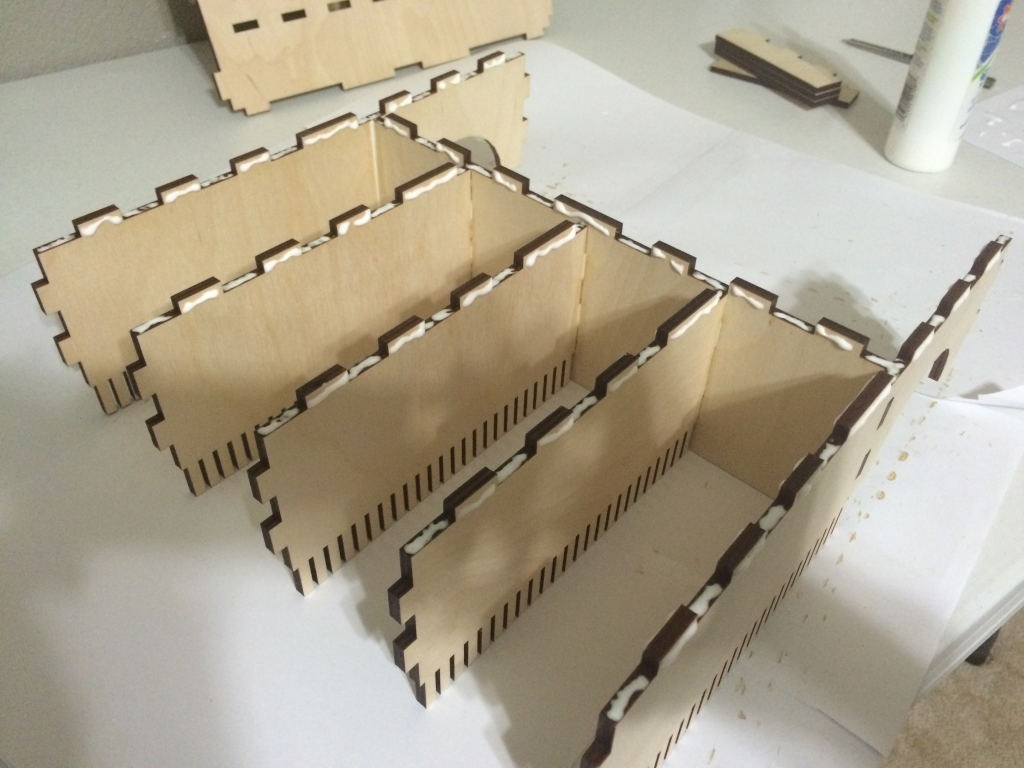
Next, place the four dividers for the player bits into the front of the chest. This is unique to the Agricola chest. Glue both sides of the tenons and the valleys.
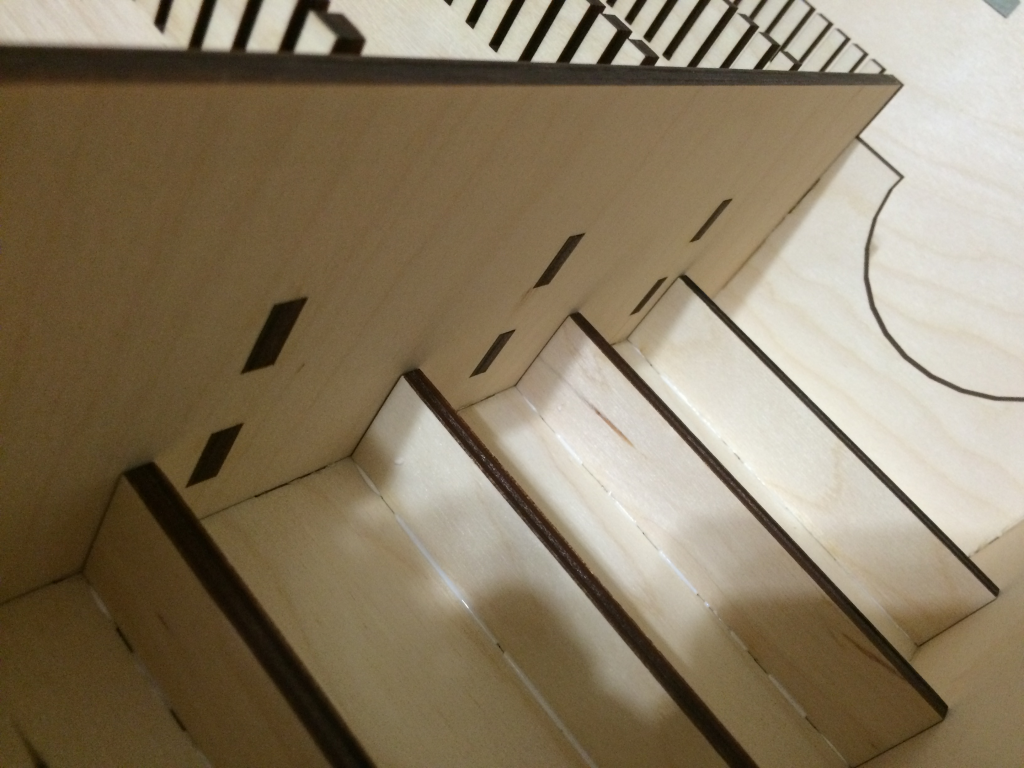
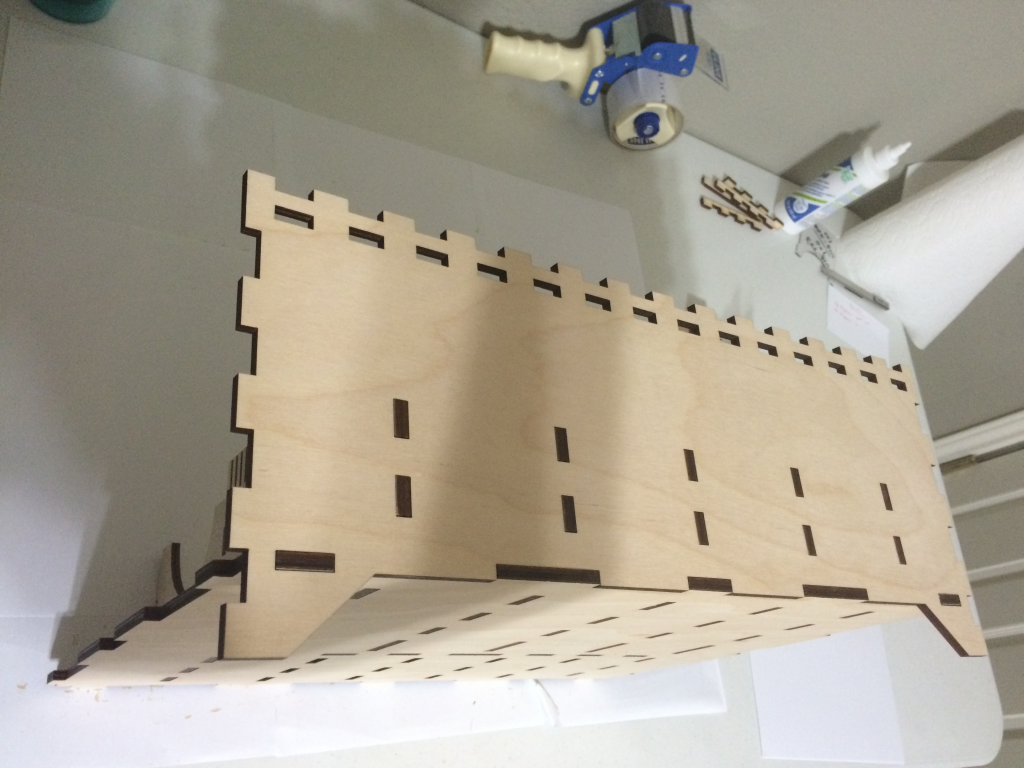
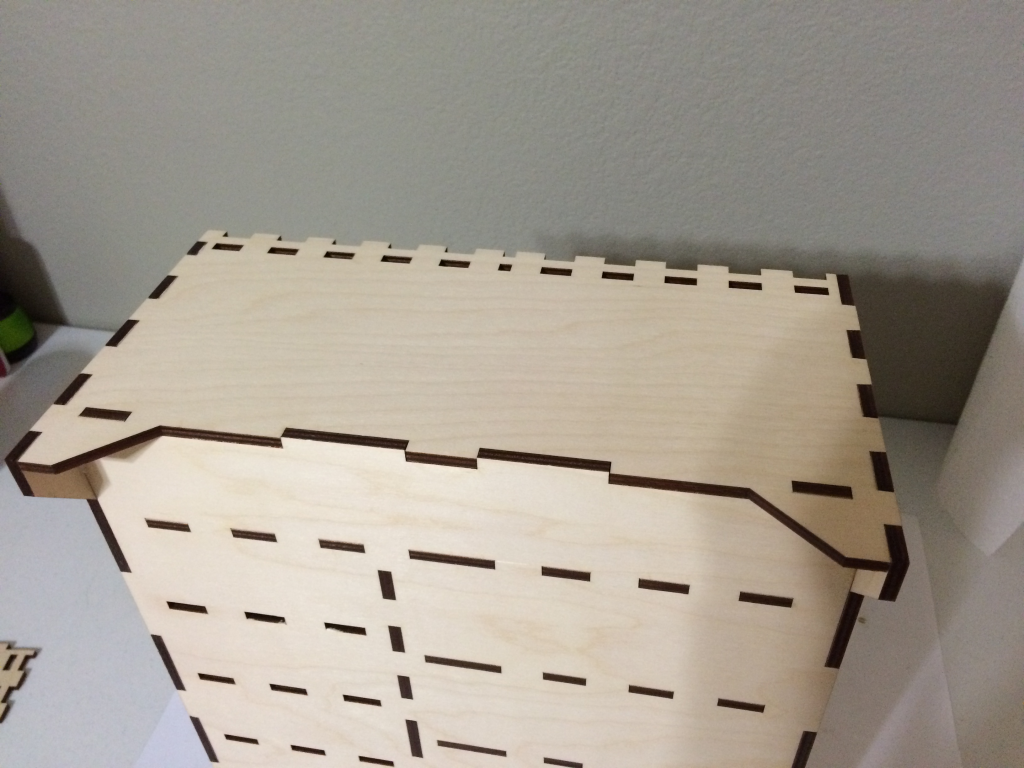
Top Rails
The top rails are provided in three sizes –
Very long – these two rails are placed on the rear portion of the chest wall.
Short Long – these two rails are placed at the very top on the side walls.
Short short – these two rails are placed in the lower position on the side walls.
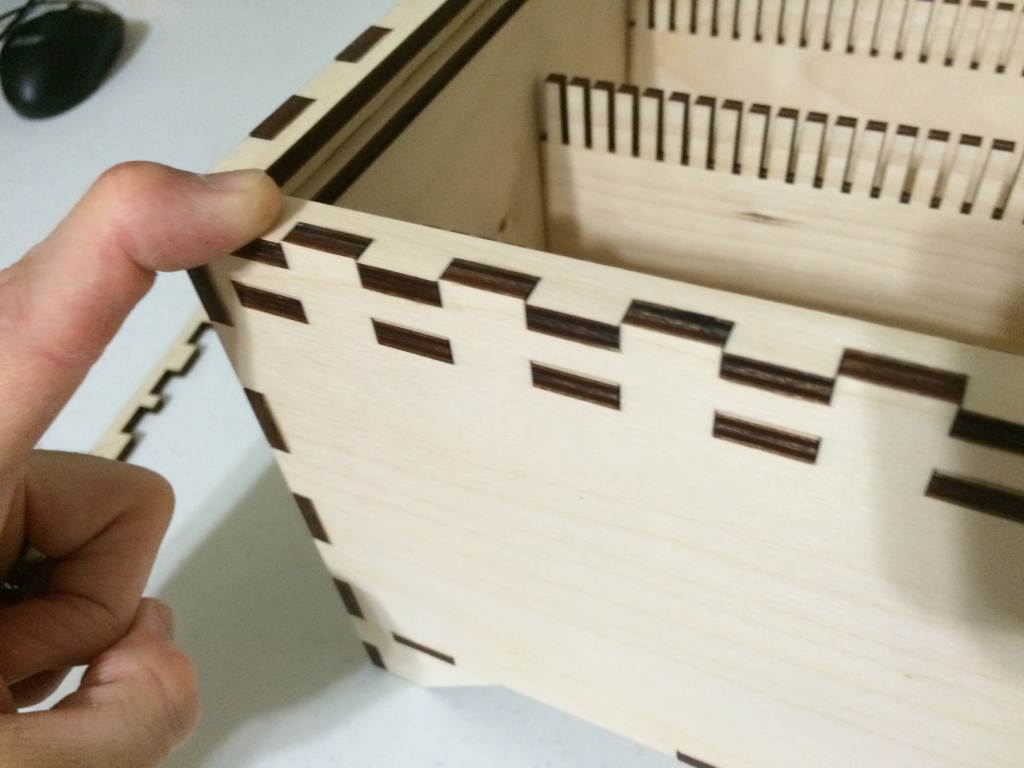
Make sure you dry fit the rails so you have a good grasp of where each one goes and pick the best side to face upwards. Also, place the lower rails first and cleanup the excess glue. Of all the areas of the chest where excess glue needs to be cleaned up, this is the most important. Excess glue left in the rail channel after construction will affect how smoothly your lid operates.
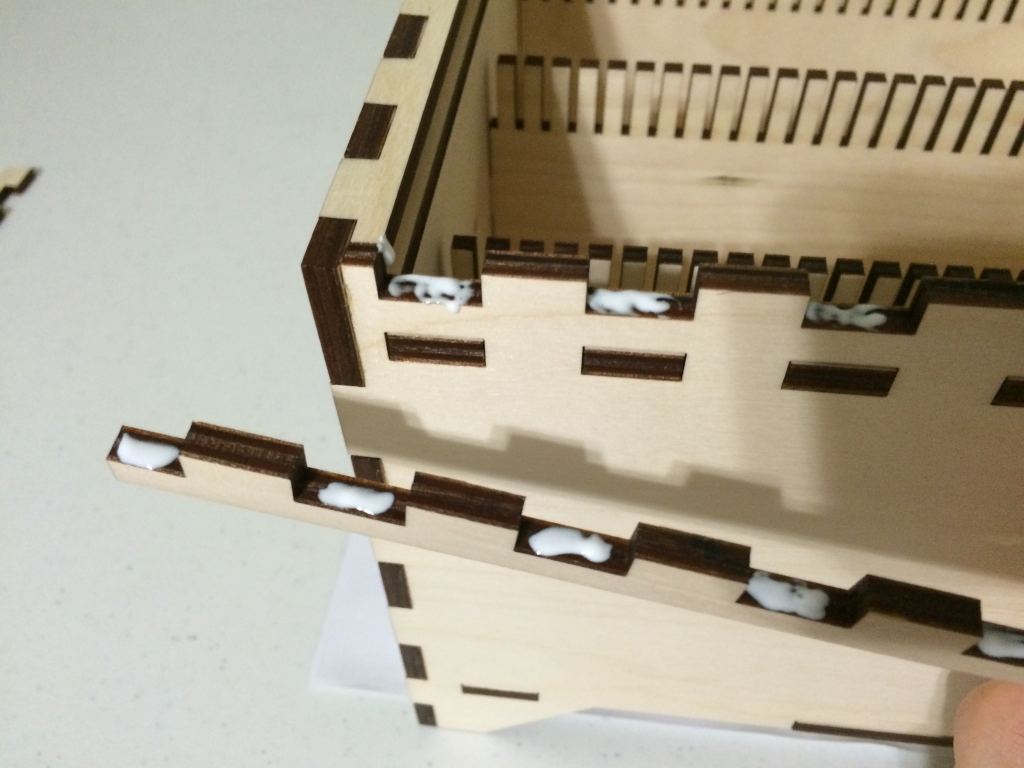
Sometimes the rails need some pressure to properly seat and stick.
Drying Time
Once completed, allow the glue to dry overnight. You may now proceed to staining and applying a finish such as polyurethane.